
Confluence
Connect to Confluence. Manage spaces, pages, content, and team collaboration
Connect to Confluence. Manage spaces, pages, content, and team collaboration
Supports authentication: OAuth 2.0
Set up the agent connector
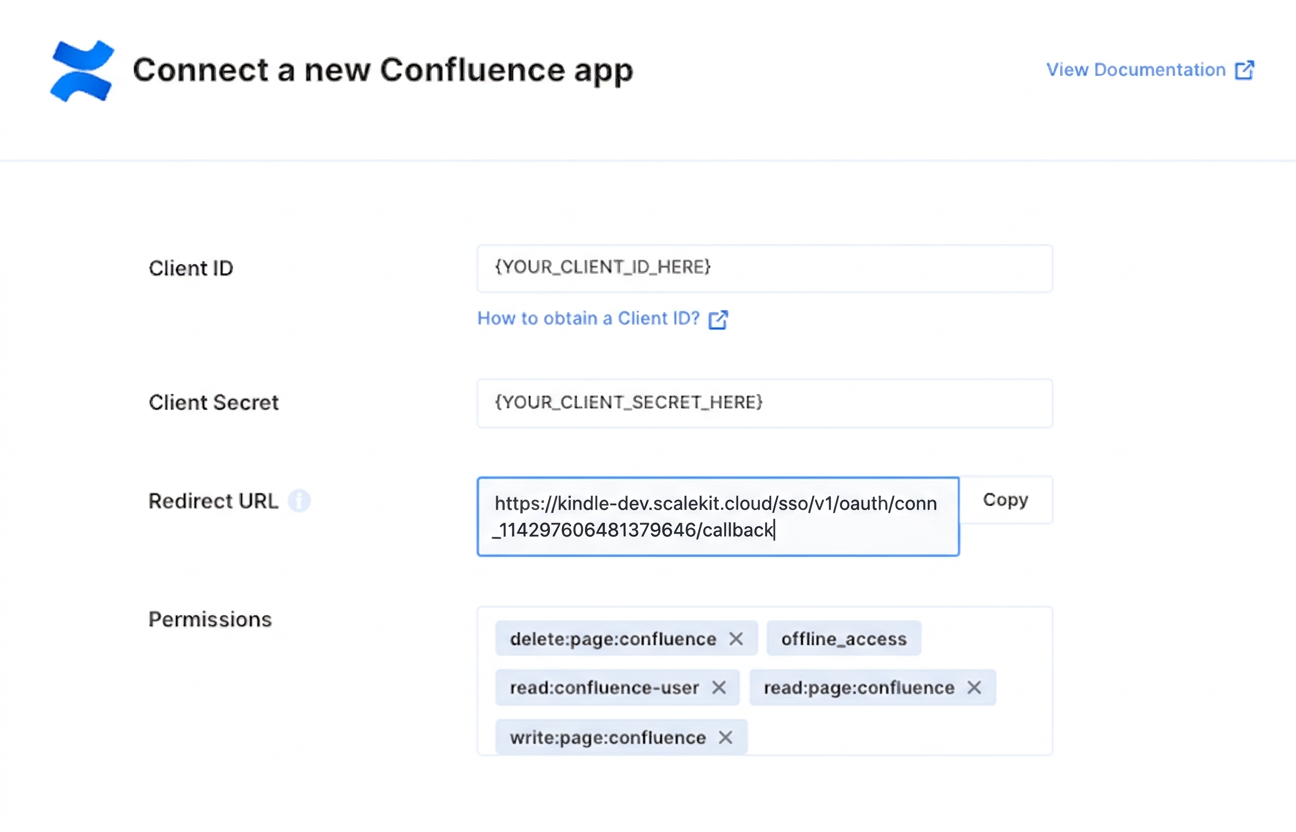
Section titled “Set up the agent connector”Register your Scalekit environment with the Confluence connector so Scalekit handles the authentication flow and token lifecycle for you. The connection name you create will be used to identify and invoke the connection programmatically. You’ll need your app credentials from the Atlassian Developer Console.
-
Set up auth redirects
-
In Scalekit dashboard, go to Agent Auth → Create Connection.
-
Find Confluence from the list of providers and click Create.
-
Copy the redirect URI. It looks like
https://<SCALEKIT_ENVIRONMENT_URL>/sso/v1/oauth/<CONNECTION_ID>/callback. -
In the Atlassian Developer Console, open your app and go to Authorization → OAuth 2.0 (3LO) → Configure.
-
Paste the copied URI into the Callback URL field and save.
-
-
Get client credentials
In the Atlassian Developer Console, open your app and go to Settings:
- Client ID — listed under Client ID
- Client Secret — listed under Secret
-
Add credentials in Scalekit
-
In Scalekit dashboard, go to Agent Auth → Connections and open the connection you created.
-
Enter your credentials:
- Client ID (from your Atlassian app settings)
- Client Secret (from your Atlassian app settings)
- Permissions — select the Confluence API scopes your app needs (see Confluence OAuth scopes)
-
Click Save.
-